
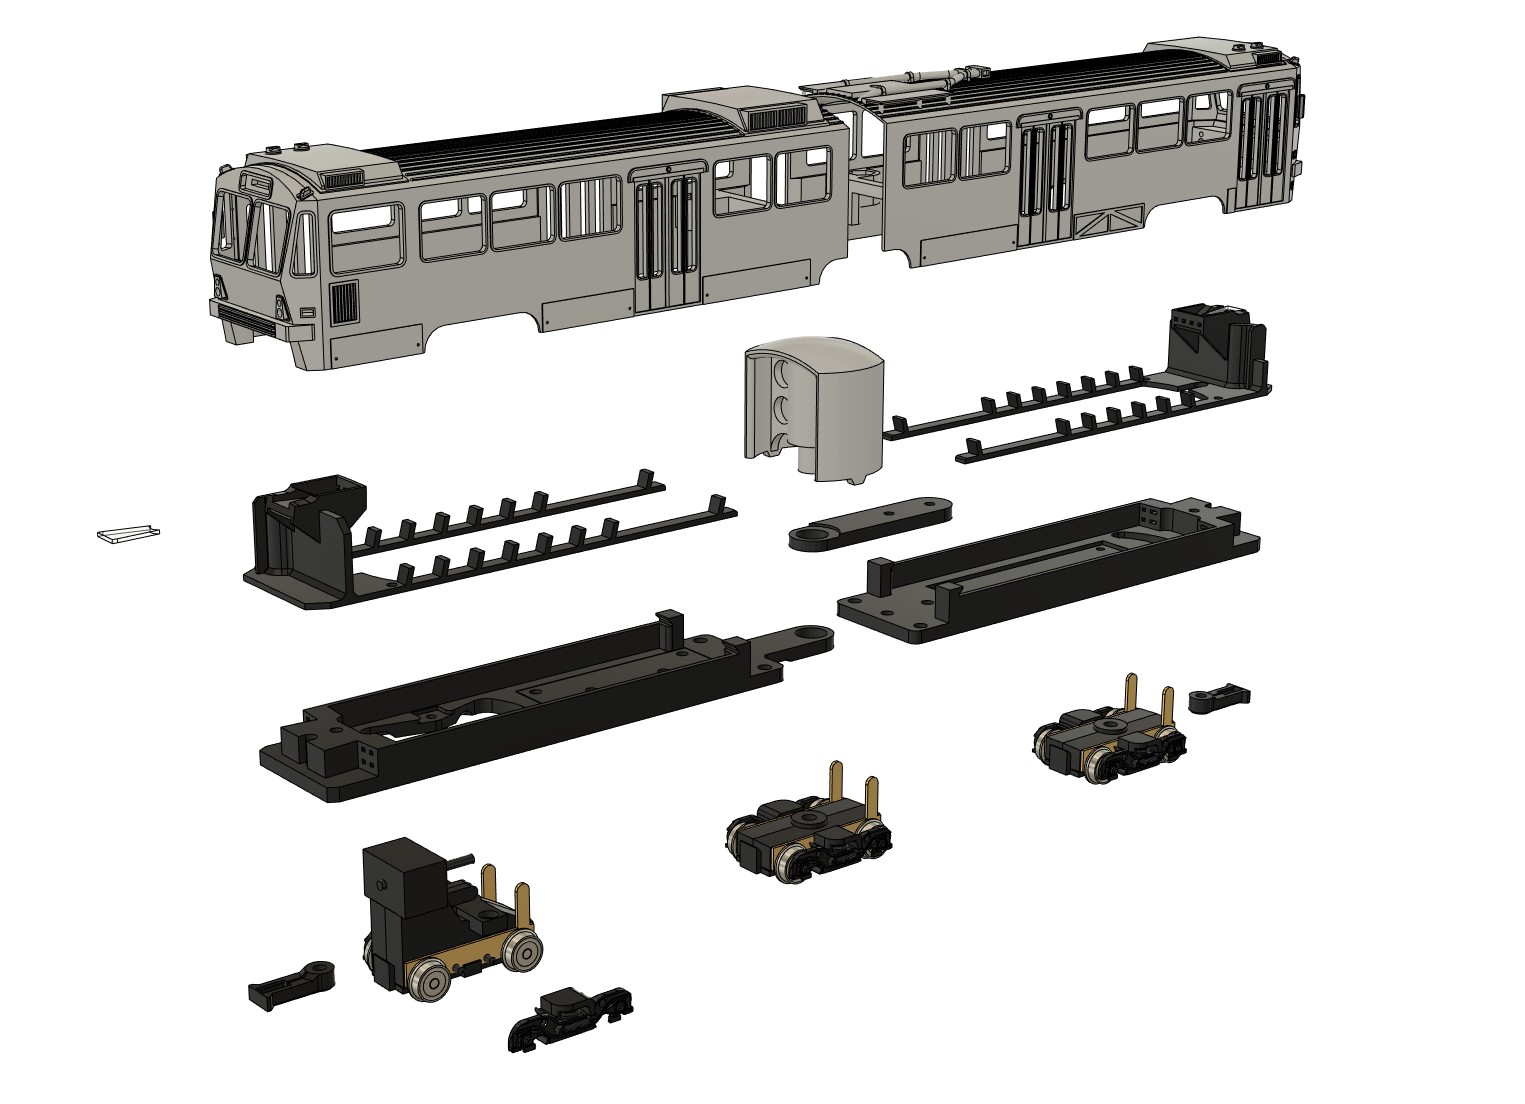
This download contains .STL files for all printed parts in my HO scale GCRTA Breda LRV model. Some parts are designed for an SLA/LCD/DLP/resin printer (I used a Formlabs Form2), while others are designed for an FDM printer (I used a Bambu X1-C and printed in ABS). It should be possible to print all parts with an SLA printer, however, though the thin interior parts might be a little tricky. The model uses the Bowser trolley mechanism and an extra dummy truck. There’s also a recession and screw holes for a Nix Trains DecoderBuddy.
Hardware used:
- M2.5 or similar screws and nuts, and washers to attach the body to the shell (there are recessions for nuts), assemble the center pivot, and attach the interior to the chassis.
- M2 or similar screws and washers for the couplers
- M1.4 or similar screws for screwing down the DecoderBuddy (optional)
- M3 or similar screw to attach the end dummy truck
- 2-56 screws for attaching most Bowser trolley parts (you can use the ones that come in the mechanism kit)
- 0.75 and 1mm fiber optic filament for lighting (your mileage may vary depending on your printer tolerances)
- 3x3mm magnets for the couplers (2 per coupler)
- 1.8/2mm round top type LEDs – I used these: https://www.amazon.com/dp/B0CZQT4B25?th=1
- 3mm RGB LEDs for the destination signs – I used these: https://www.amazon.com/dp/B0DHX7J4DS?th=1
Assembly tips:
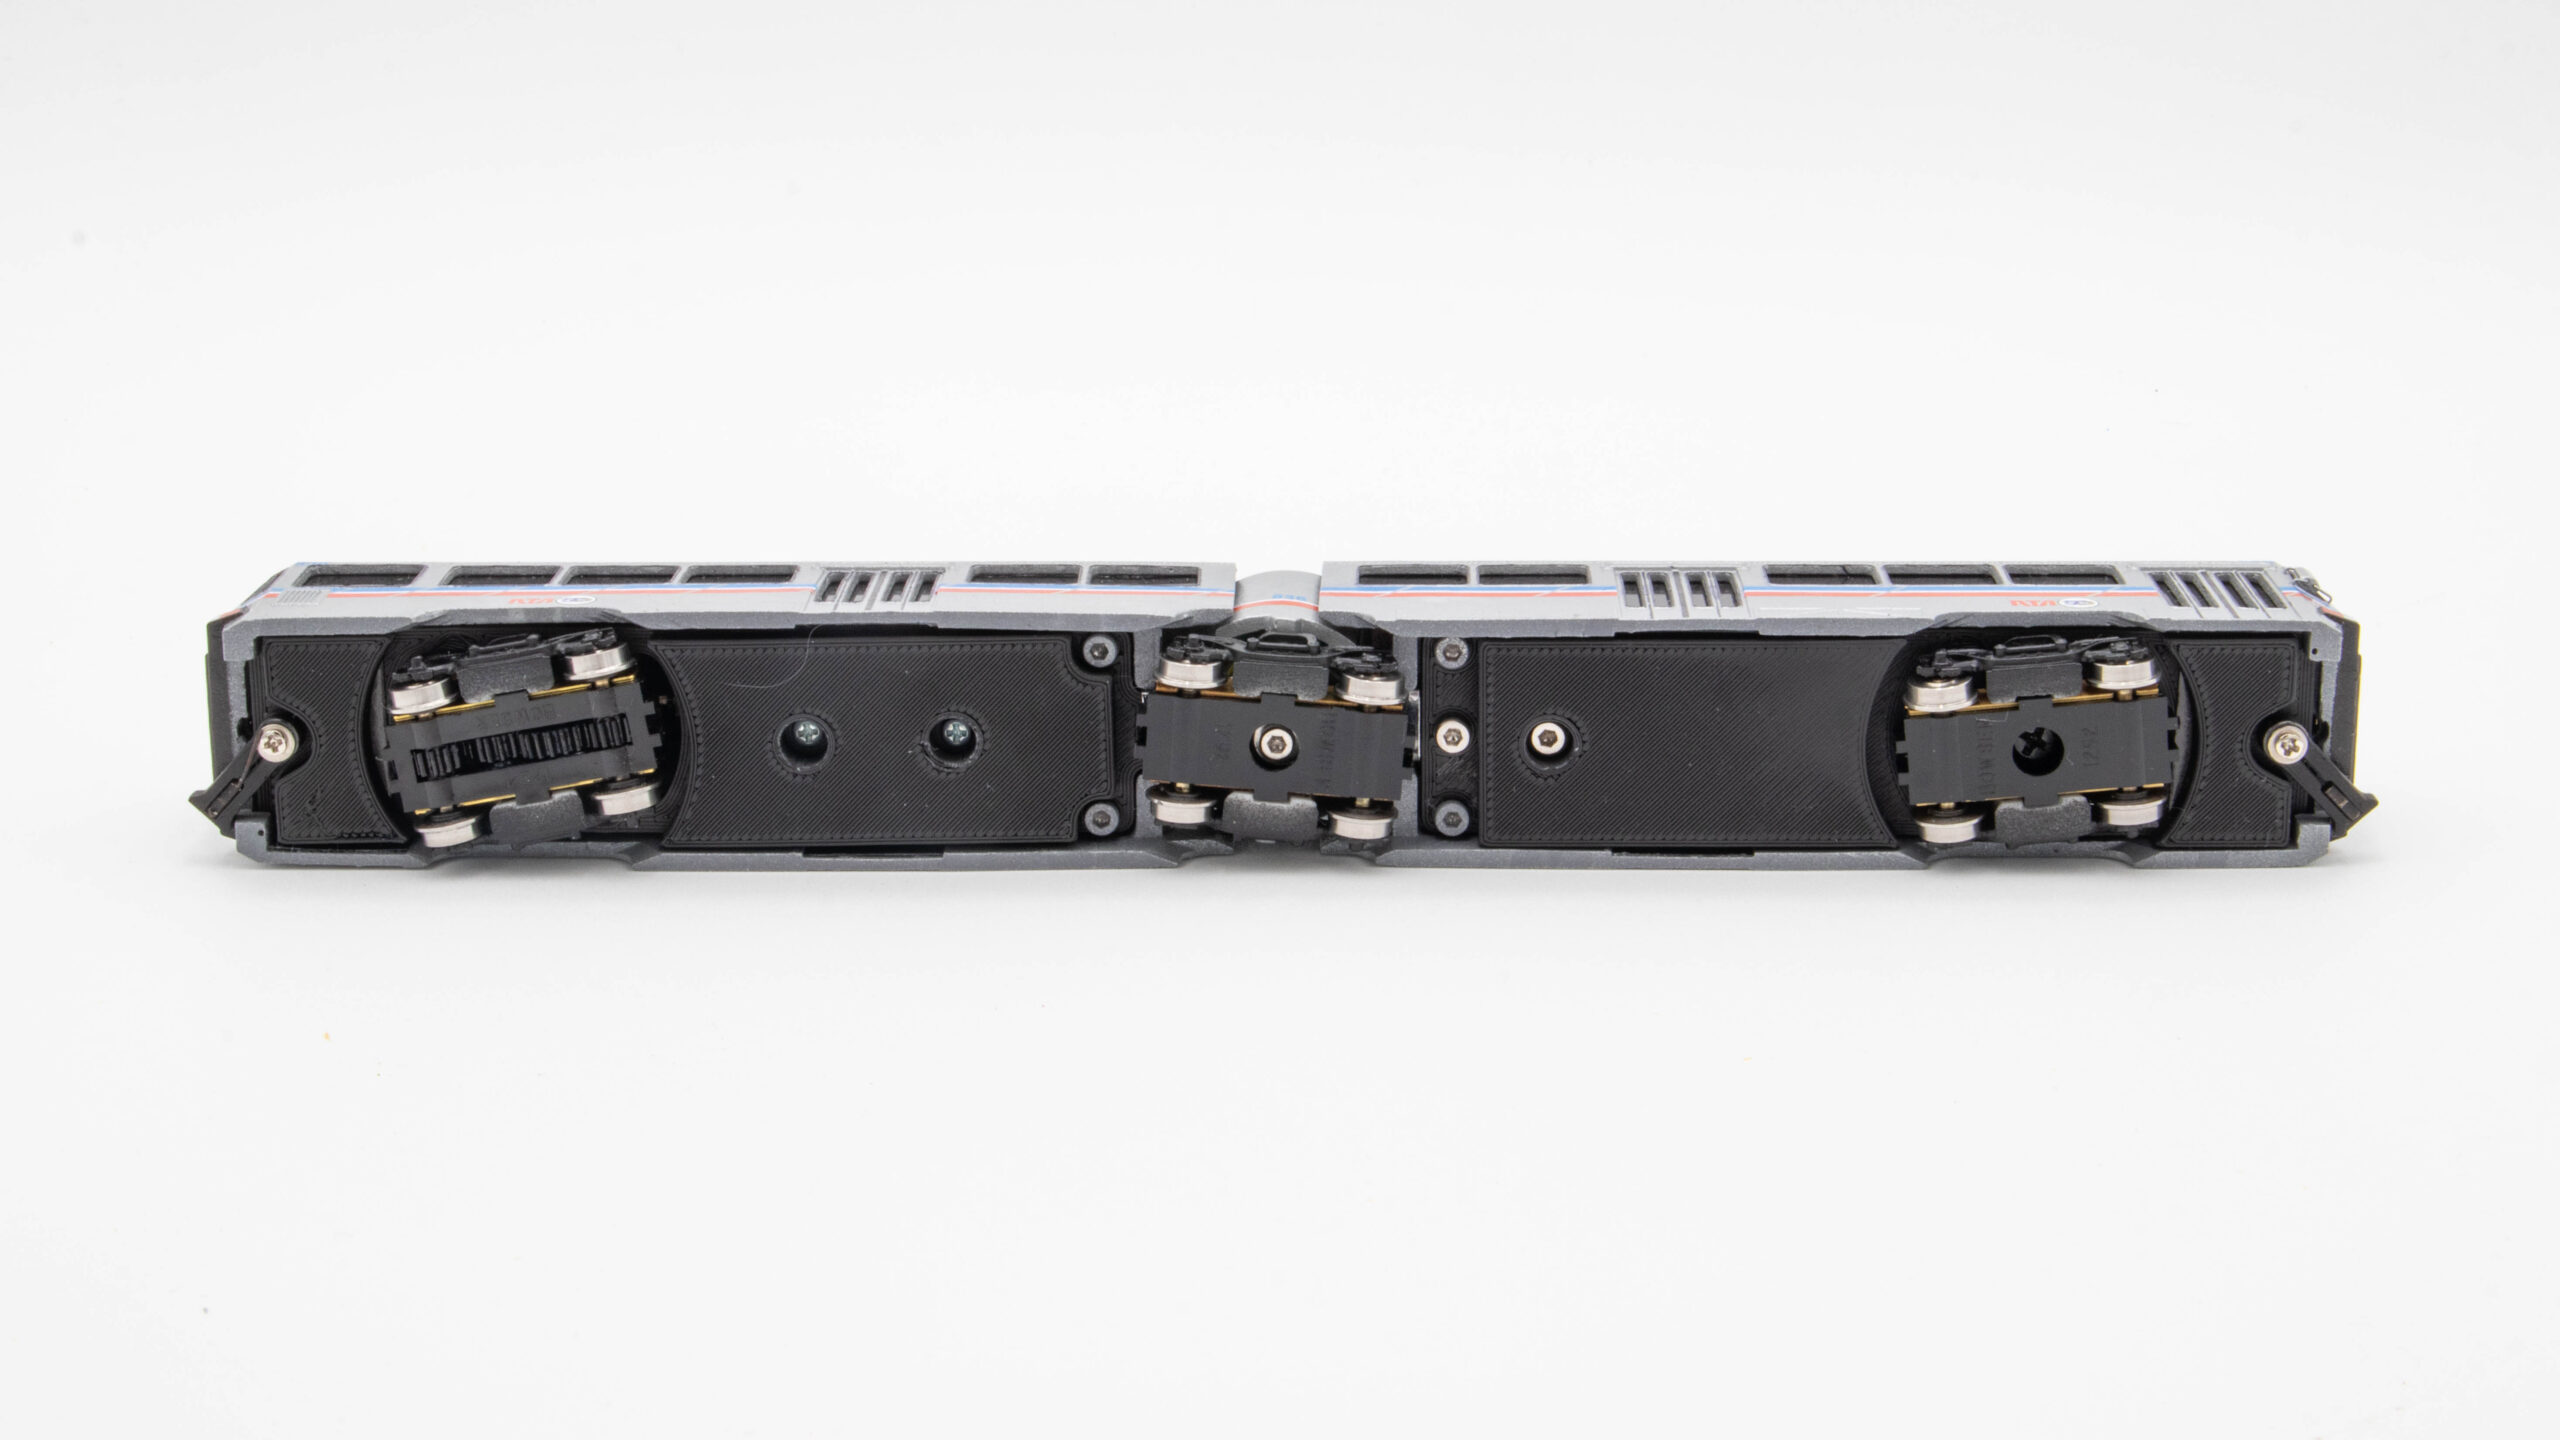
- A nut slots into the center bendy bit so a long M2.5 screw can be threaded tightly into it. Screw the center truck tightly to the bendy bit (they should be rigid to each other). You may need to use a washer since the hole on the Bowser truck is a little large. The bendy bit acts as the pivot for the two halves.
- FDM parts with holes that should be screwed into should be self tapping, but you may need to drill them.
- You’ll have to cut down the vertical ears on the pickups on the center trucks.
- The holes in the bendy bit are for passing wires through.
- The destination sign light pipes should be printed in clear resin, or alternatively you could print them in anything and use them as a guide to cut out the part from clear plastic sheet.
- The mirrors and mounting points on the shell have holes for 0.015″ wire. The holes in the mirrors go all the way through. I found the wire surprisingly easy to bend without a jig.
- I had the decals printed by Fusion Scale Graphics. You can download the art I made for free here.
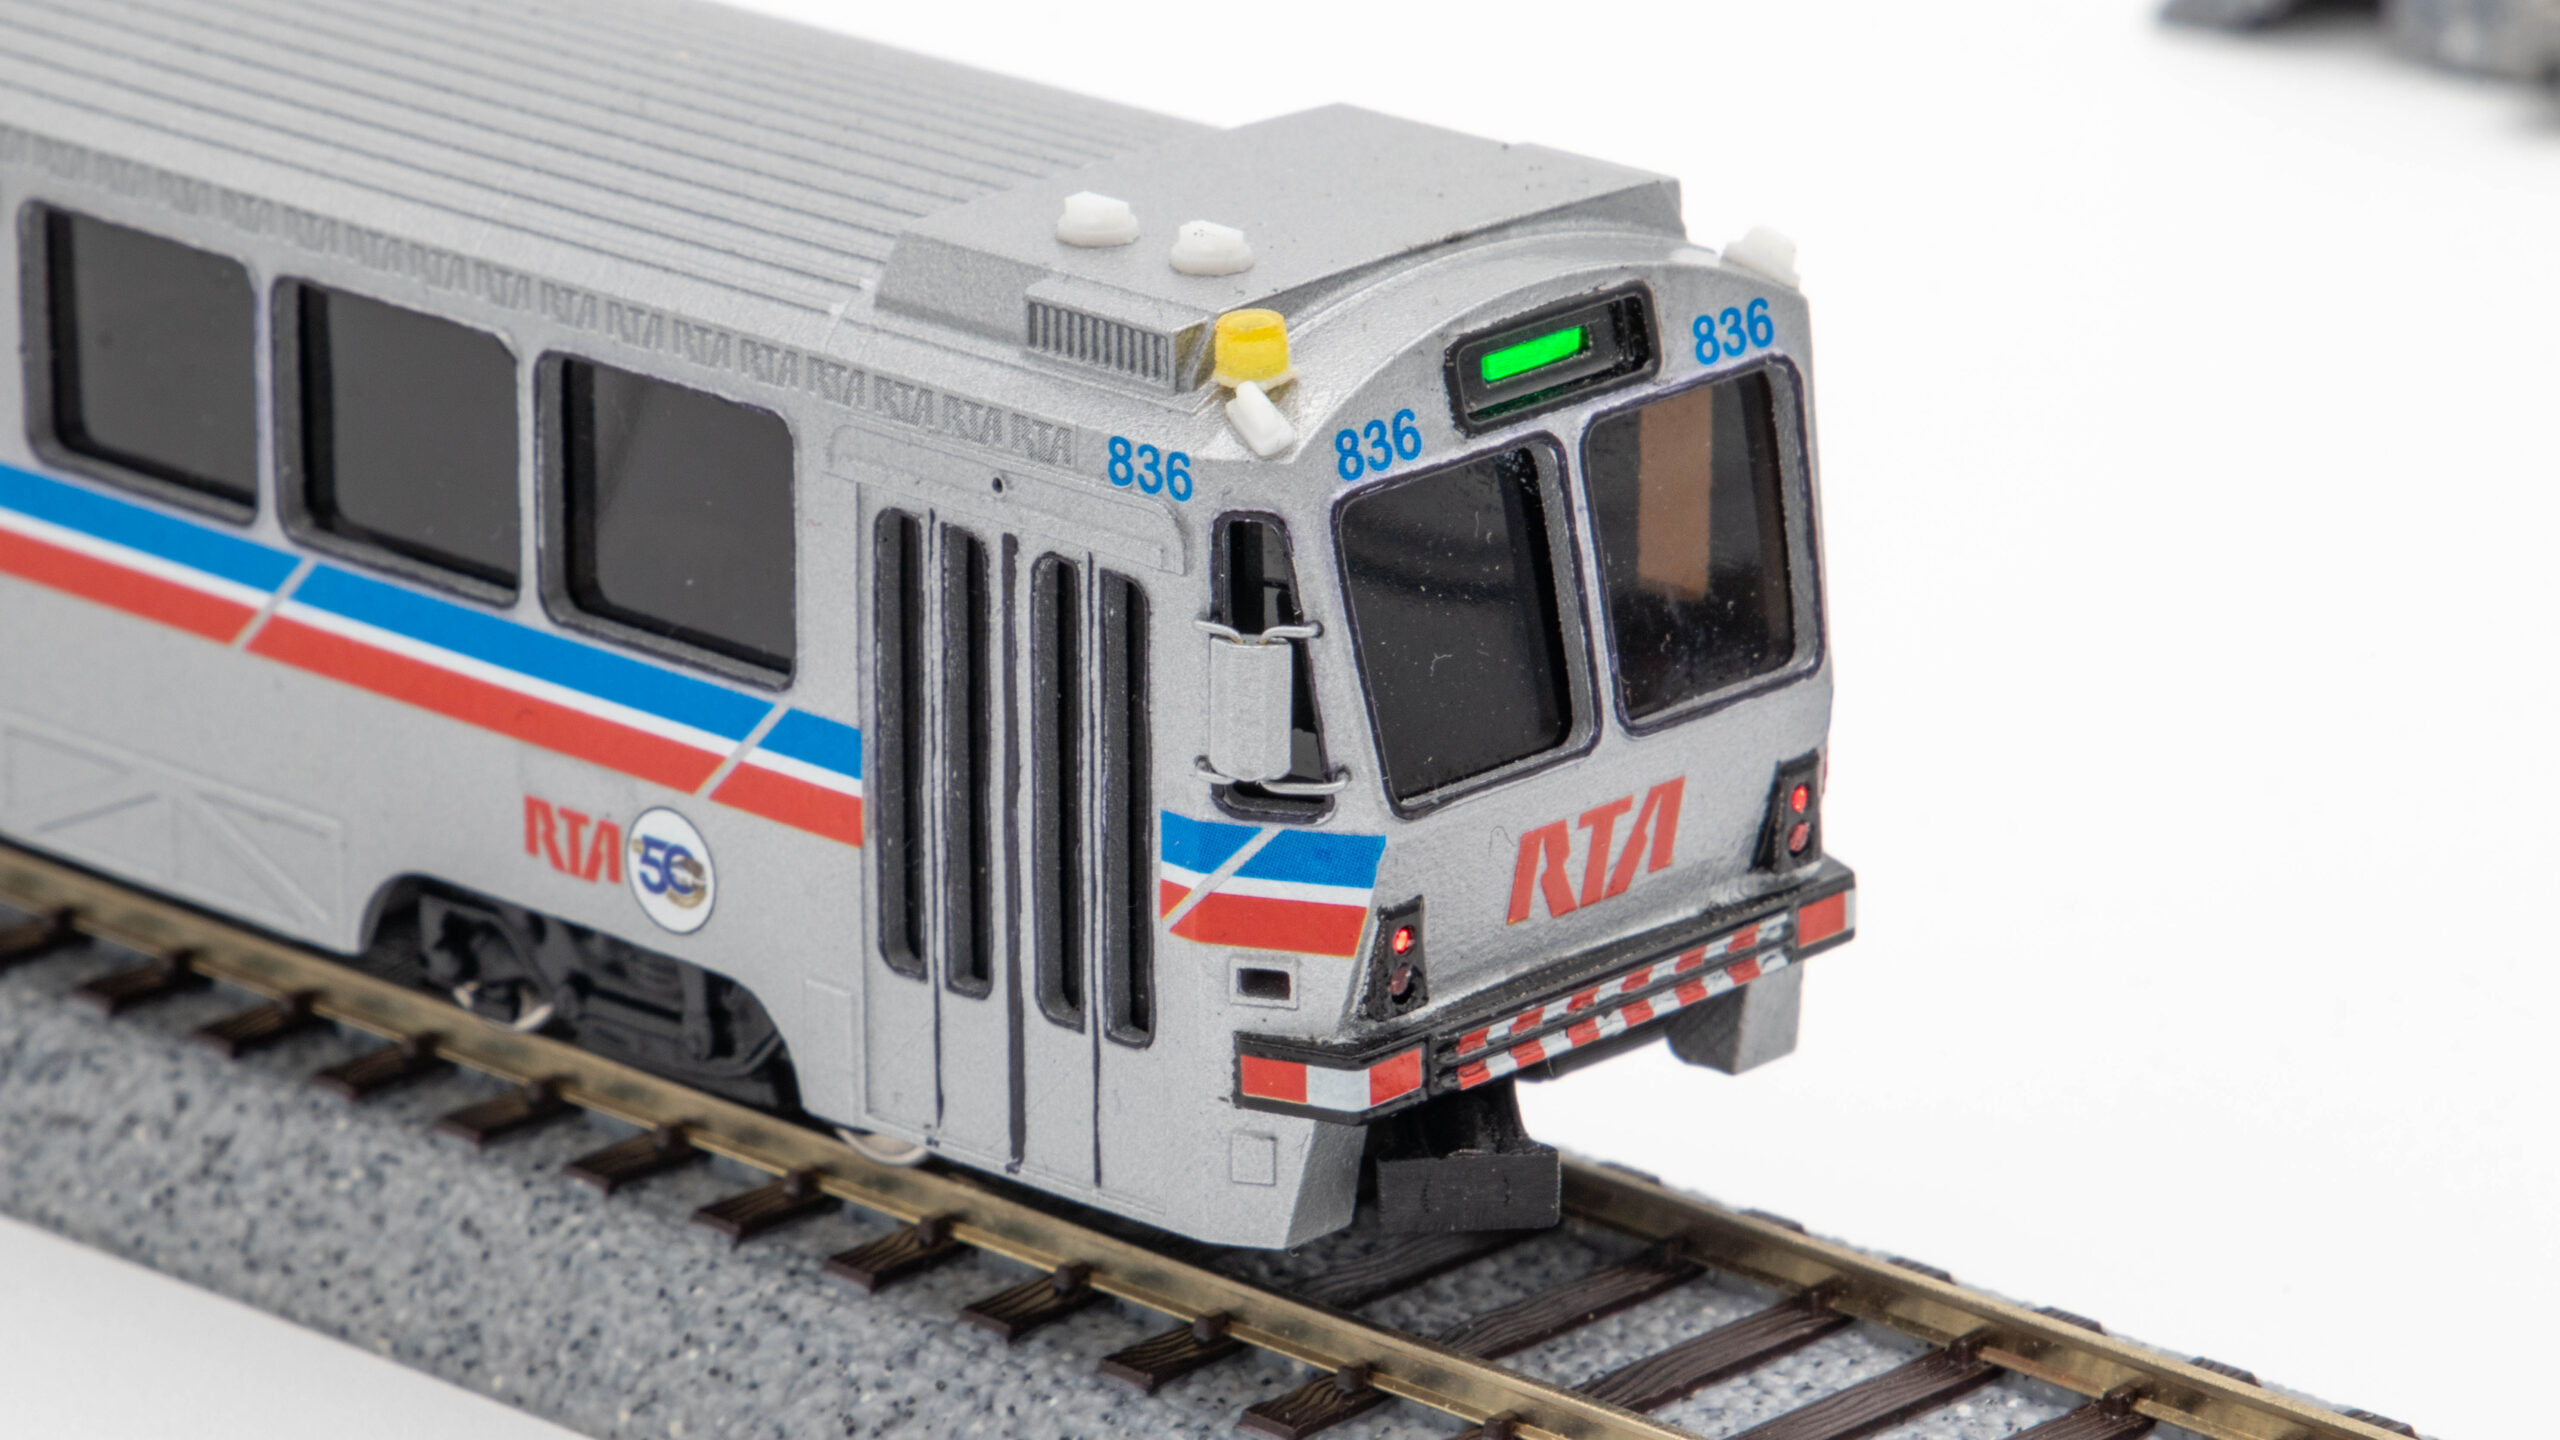
Mirror detail. You’re on your own with the beacon, though there is a hole in the shell for it and a flat spot in the interior for mounting an LED
(note, this photo shows some printed weights (I filled them with buckshot) that I did not include in the download because they weren’t very effective; a few 1/4oz steel weights will do much better if you need them)